Ensuring safety and security on the road has never been more important. One way to achieve this is by installing a dash cam, a useful device that records your driving experiences and provides crucial evidence in case of accidents or disputes.
This guide will walk you through the process of installing a dash cam on a Honda Accord, detailing the necessary tools, preparation, and step-by-step instructions for a successful installation.
Essential Tools and Equipment
Before installing your dash cam, ensure you have the necessary tools and equipment, such as:
- A fuse tap kit
- Electrical tape
- A trim removal tool
- A wire cutter/stripper
- A multimeter (optional)
Preparing for the Installation
Locating the Fuse Box
Your Honda Accord’s fuse box is likely located under the dashboard on the driver’s side. Check your owner’s manual for the exact location and a diagram of the fuse layout.
Assessing the Dashboard and Windshield
Before starting the installation, inspect your dashboard and windshield for any obstructions or potential hazards. Ensure there’s enough space for the dash cam and its wiring, and that the device won’t obstruct your view while driving.
Step-by-Step Installation Guide

Step 1: Mounting the Dash Cam
Finding the Best Location
Choose a spot on the windshield that provides a clear view of the road while minimizing any obstruction to the driver’s view. Ideally, position the dash cam behind the rearview mirror.
Securing the Dash Cam
Clean the windshield area where you plan to mount the dash cam. Peel the protective film off the adhesive pad on the mount, and then press it firmly against the windshield. Attach the dash cam to the mount according to the manufacturer’s instructions.
Step 2: Routing the Power Cable
Hiding the Cable
To keep your dashboard tidy and prevent potential hazards, hide the power cable by tucking it into the headliner, A-pillar, and weather stripping along the door frame. Use a trim removal tool to gently pry open gaps to insert the cable.
Connecting the Cable
Route the cable towards the fuse box, leaving enough slack for easy access. Keep in mind the location of the
Connecting the Cable (Continued)
Keep in mind the location of the fuse box as you route the cable, ensuring you have enough length to reach it. Use cable clips or adhesive pads to secure the cable along its path if necessary.
Step 3: Connecting to the Fuse Box
Identifying the Right Fuse
To power your dash cam, you’ll need to connect it to a fuse that’s active when the ignition is on. Consult your Honda Accord’s owner’s manual for the fuse layout and identify a suitable fuse, such as one for the radio or accessory power socket.
Using a Fuse Tap
A fuse tap allows you to connect the dash cam’s power cable to the fuse box without modifying the vehicle’s wiring. Cut the end of the power cable, strip the insulation, and attach the cable to the fuse tap using the provided connectors. Insert the fuse tap into the chosen fuse slot, ensuring it’s secure
Testing Your Dash Cam
Once the installation is complete, start your Honda Accord and check that the dash cam powers on automatically. Test the device’s features and settings, and ensure it records clear video footage.
Troubleshooting Common Issues
Power Issues
If your dash cam doesn’t turn on or loses power intermittently, check the fuse tap connection and ensure it’s secure. You may also want to test the fuse itself using a multimeter to confirm it’s functioning correctly.
Connectivity Issues
If your dash cam has Wi-Fi or Bluetooth capabilities and you’re experiencing connection issues, consult the manufacturer’s manual for troubleshooting steps or contact their customer support.
Frequently Asked Question
Q1: Can I connect my dash cam to the car’s battery instead of the fuse box?
Yes, you can connect your dash cam directly to your car’s battery. However, this method requires more complex wiring and may result in increased power consumption when the vehicle is off.
Q2: Do I need a professional to install my dash cam?
While a professional installation can ensure a clean and secure setup, many dash cam installations can be done by following the manufacturer’s instructions and using basic tools.
Q3: Will installing a dash cam void my vehicle’s warranty?
Installing a dash cam typically does not void your vehicle’s warranty, as long as you don’t damage any components or modify the vehicle’s wiring.
Q4: How do I know if my dash cam is recording?
Most dash cams have an LED indicator or on-screen display to show their recording status. Consult your device’s manual for specific details.
Q5: Can I use my dash cam as a parking monitor?
Some dash cams have a parking mode feature, which allows them to record when the vehicle is parked. Check your device’s specifications to see if this feature is available.
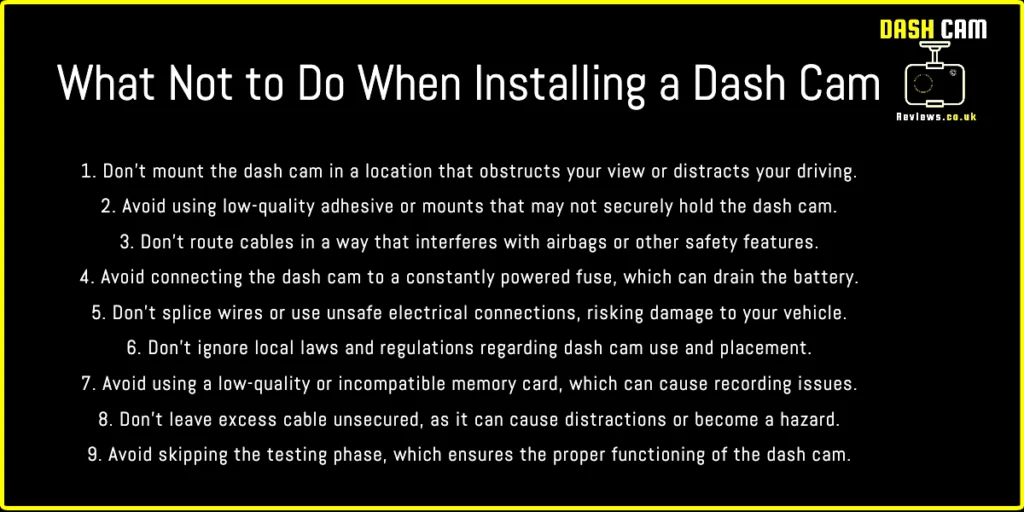
How Not To Install A Dash Cam.

Conclusion
How to Install a Dash Cam on a Honda Accord is a straightforward process if you follow these guidelines and use the right tools. With your dash cam installed, you’ll have peace of mind knowing you have a reliable witness in case of any incidents on the road. Enjoy the benefits of added security and drive safely!


