Congratulations on deciding to install a dash cam on your Honda CR-V! A dash cam is an invaluable tool that can protect you and your car, offering peace of mind and security on the road. This comprehensive guide will take you through the process of choosing the right dash cam, installing it step by step, and maintaining it for optimal performance.
Why Install a Dash Cam?
Dash cams are essential in today’s world, as they provide an extra layer of protection for drivers. They record your driving activity, helping you to capture any incidents, accidents, or suspicious behaviour. Having a dash cam can also potentially lower your insurance premiums and provide valuable evidence in case of disputes or legal issues.
Tools Required
You’ll need a few tools to complete the installation. Make sure you have the following items:
- Dash cam and accessories (mount, power cables, etc.)
- Trim removal tools
- Cable clips or adhesive cable holders
- Electrical tape or cable ties
- A 12V to 5V hardwire kit (optional)
Step-by-Step Installation Guide

Now that you have everything you need, it’s time to start the installation process.
Step 1: Choose the Best Location: The optimal location for your dash cam is usually behind the rearview mirror, as this provides a clear and unobstructed view of the road. Make sure it doesn’t block your vision or interfere with the operation of the mirror.
Step 2: Mount the Dash Cam: Attach the mount to the windshield using the adhesive pad or suction cup provided. Make sure it’s secure and won’t fall off during your drive.
Step 3: Connect the Power Source: Plug the power cable into the dash cam and connect it to your car’s 12V power outlet or use a 12V to 5V hardwire kit to connect it directly to your car’s fuse box.
Step 4: Organise the Cables:* Use cable clips or adhesive cable holders to secure the power cable along the windshield’s edge and down the A-pillar. Hide the cable behind the car’s interior trim, ensuring it’s not obstructing your view or creating a tripping hazard.
Step 5: Connect to the Rear Camera (if applicable): If your dash cam includes a rear camera, route the connecting cable from the front camera to the rear of your Honda CR-V. Similar to the front camera, use cable clips or adhesive cable holders to secure the cable along the interior trim. Attach the rear camera to the back window or rear bumper, depending on the camera’s design.
Step 6: Test the Dash Cam: Start your car and check if the dash cam powers on and records properly. Adjust the camera angle if necessary to ensure it captures a clear view of the road.
Maintenance and Troubleshooting
Maintenance Tips: Regularly check your dash cam for any software updates and clean the lens with a soft cloth. Ensure the cables are still secure and replace the adhesive pads if needed.
Common Troubleshooting Solutions: If your dash cam isn’t working correctly, try these solutions: check the power source, ensure the SD card is inserted correctly and not full, and verify that the cables are securely connected.
Frequently Asked Questions
Can I install a dash cam on my Honda CR-V without professional assistance?
Yes, you can install a dash cam without professional help. Follow this guide to ensure a successful installation. However, if you’re not confident in your abilities, it’s best to seek professional assistance.
How do I choose the right SD card for my dash cam?
Choose a high-quality, high-speed SD card from a reputable brand. Look for a Class 10 or UHS-1 card with a capacity between 32GB and 128GB, as these are generally compatible with most dash cams.
Will installing a dash cam void my Honda CR-V’s warranty?
Installing a dash cam should not void your car’s warranty. However, it’s best to consult your vehicle’s manual or contact your local dealership to confirm.
How can I prevent my dash cam from overheating?
Ensure your dash cam is not exposed to direct sunlight for extended periods. If you’re parking in hot weather, consider using a sunshade or parking in a shaded area.
Can I use my dash cam as a parking monitor?
Some dash cams have a parking mode feature that allows them to record when your car is parked. Ensure your chosen dash cam has this feature and follow the manufacturer’s instructions for setup.
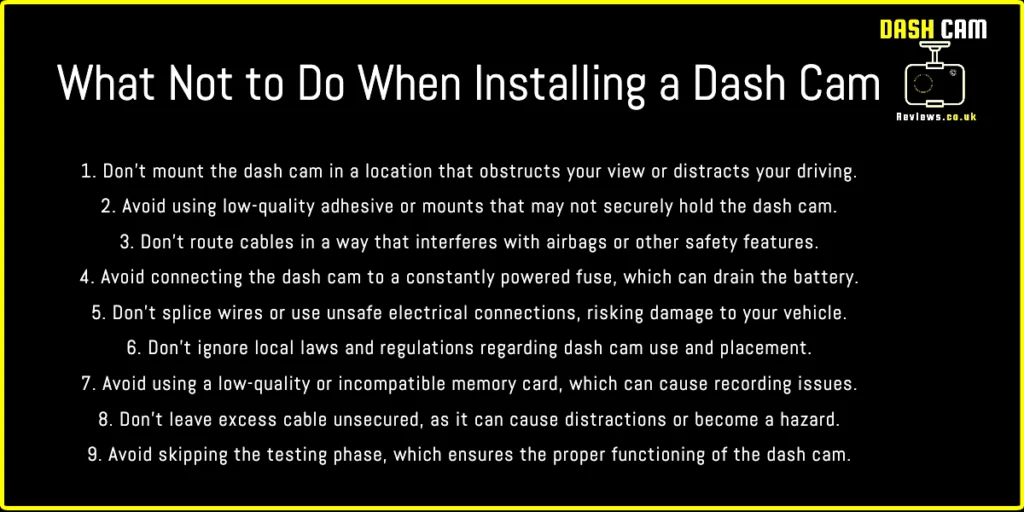
How Not To Install A Dash Cam.

Conclusion
Learning how to install a dash cam on a Honda CR-V is a simple and rewarding process. By following this step-by-step guide, you’ll be able to enjoy the benefits of having a dash cam in no time. Remember to maintain your dash cam regularly and consult this guide if you encounter any issues. Happy driving!


