Driving a Toyota RAV4 offers reliability, comfort, and performance. To further enhance your vehicle’s safety and functionality, installing a dash cam can provide a valuable addition. In this Toyota RAV4 Dash Cam Installation guide, we will cover everything you need to know about choosing, installing, and maintaining a dash cam for your Toyota RAV4. Let’s get started, shall we?
Why Install a Dash Cam in Your Toyota RAV4?
Dash cams provide several benefits, including increased safety, evidence in case of accidents, and even potential insurance savings. They also provide a sense of security and peace of mind when you’re on the road. So, why not take advantage of these benefits by installing one in your Toyota RAV4?
Preparing for Installation
Tools Needed
Before starting the installation process, gather the necessary tools such as a fuse tap kit, trim removal tools, wire stripper, crimping tool, and cable ties.
Locating Fuse Box
The fuse box in a Toyota RAV4 is typically located under the dashboard on the driver’s side. Consult your vehicle’s owner’s manual for the exact location.
Dash Cam Mounting
Positioning the Camera
To ensure optimal video coverage, position the dash cam behind the rearview mirror, allowing for an unobstructed view of the road.
Types of Mounts
There are several types of mounts available, including suction cup mounts, adhesive mounts, and rearview mirror mounts. Choose the one that best suits your preferences and vehicle setup.
Wiring the Dash Cam
Hardwiring vs. Cigarette Lighter Adapter
Hardwiring the dash cam connects it directly to your vehicle’s electrical system, providing a cleaner installation and constant power. Alternatively, a cigarette lighter adapter is an easier option, but it may require unplugging and re-plugging the camera each time you use the vehicle.
Hardwiring Process
Finding a Power Source
Locate an appropriate fuse in the fuse box that provides power when the ignition is on. Typically, you can use the fuse for the radio or a similar accessory.
Fuse Tap Installation
Install a fuse tap onto the chosen fuse, ensuring a secure connection. This will provide power to your dash cam without altering the vehicle’s wiring.
Running the Cable
Tucking and Routing
Tuck the power cable along the headliner, down the A-pillar, and under the dashboard, using trim removal tools to help guide the cable. This will keep the cable hidden and prevent it from interfering with driving.
Securing the Cable
Use cable ties to secure the cable in place, ensuring it is taut and does not sag or create a tripping hazard.
Connecting the Dash Cam
Power Cable
Connect the power cable to the dash cam and ensure it is securely plugged in.
Rear Camera (if applicable)
If your dash cam includes a rear camera, run the cable from the front camera to the rear, following a similar process as the power cable. Connect the rear camera and mount it on the rear windshield.
Adjusting the Camera Angle
Tips and Tricks
Once the dash cam is mounted and connected, adjust the camera angle to capture the best possible view of the road. Ensure that the horizon is centered in the frame and that the camera is not tilted too far up or down.
Testing the Dash Cam
Checking for Proper Functionality
Turn on your vehicle and ensure the dash cam powers on and records as expected. Review the footage to verify that the camera angle is correct and the video quality meets your expectations.
Troubleshooting Common Issues
Power Issues
If your dash cam is not powering on, double-check the fuse tap connection and ensure the chosen fuse is functional. Also, verify that the power cable is securely connected to the dash cam.
Recording Issues
If the dash cam is not recording properly, check the storage capacity and ensure the memory card is properly inserted. Additionally, verify that the camera settings are correctly configured.
Dash Cam Maintenance
Cleaning
Regularly clean your dash cam’s lens with a microfiber cloth to maintain optimal video quality.
Software Updates
Check for software updates periodically and install them as needed to keep your dash cam running smoothly and efficiently.
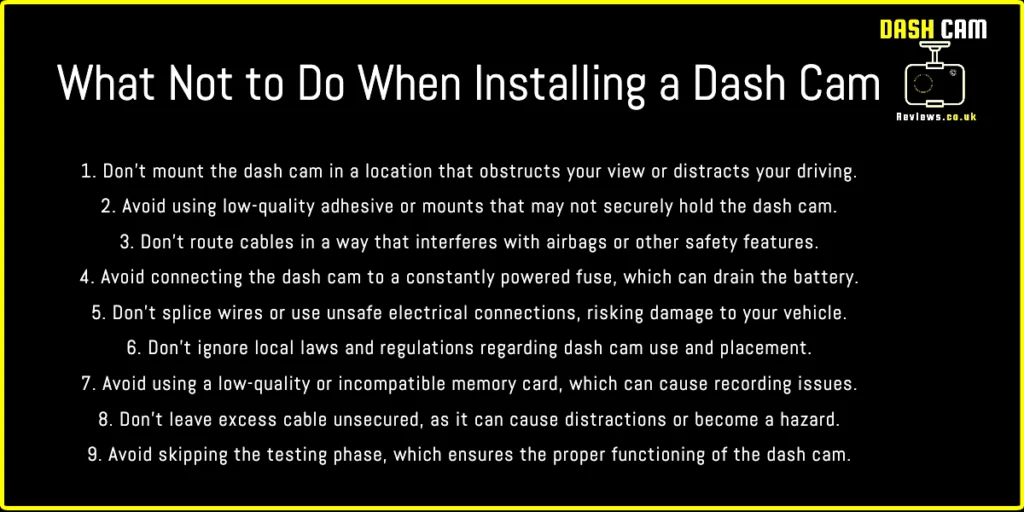
How Not To Install A Dash Cam.

Frequently Asked Questions (FAQs)
- Can I install a dash cam myself, or do I need a professional? While a professional installation is recommended for hardwiring, you can still complete a dash cam installation yourself if you feel comfortable with the process and have the necessary tools.
- Will a dash cam drain my Toyota RAV4’s battery? If properly installed and connected to an ignition-switched fuse, the dash cam should not drain your vehicle’s battery.
- What is the recommended memory card size for a dash cam? A 32GB or 64GB memory card is typically recommended for dash cams, but larger
Conclusion
By following this Toyota RAV4 Dash Cam Installation guide, you can enjoy the benefits of increased safety, security, and peace of mind on the road. With the right dash cam and proper installation, your Toyota RAV4 will be even more equipped for the journeys ahead.


